A "Gram Original"...her famous Peach Pie. My baby bro gets treated to this whenever she makes it, and now, after seeing how "simple" (albiet a bit putzy) it is, I can make it too! Yippee!!

Begin by peeling and slicing your peaches.
First, cut around the peach "width-wise".
Then, top to bottom in 1/2-3/4 inch slices.
The "chunks" of peaches will begin to fall off the pit into the bowl that you have strategically placed beneath the peach you are cutting.
Next up, sugar. Yum.
Tapioca. Yum again.
Tapioca is kinda weird, isn't it? I love it, but it's like...like...like big fish eggs or something.
Alrighty then...carrying on...a dash of salt.
And now prep your lemon for juicing...roll and smash that sucker to get it all juicy.
Cut the lemon in half, take out the seeds and squeeze the juice into your peach mixture.
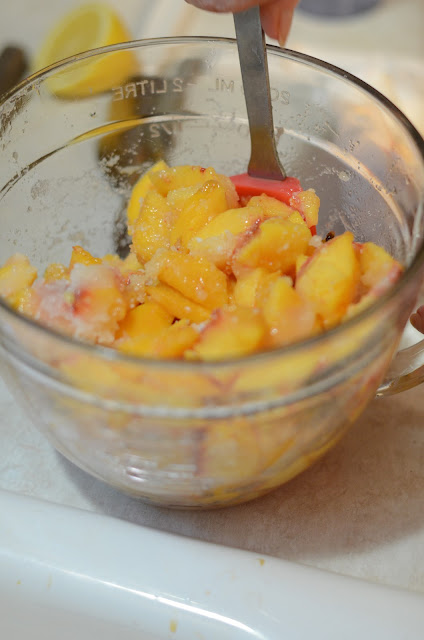
Stir it all around and set it aside to get all juicy and yummy and ready to be put into a pie crust.
Speaking of crust...dust your surface and your rolling pin with flour and rub it all around.
Take your pie dough and roll it into a nice round circle. You can't make me tell you whether or not this is a store bought or homemade crust. I ain't tellin'.
Okay, fine. I'll tell. But only because it's a good tip. Gram uses store bought. She says she has never been able to make a crust that is as flaky as a store one and "besides, who eats the pie for the crust?!"
Man, that woman is wise.
When it's the size and thickness that you want, fold it in half and gently place it in your pie dish.
Now, take your knuckle and press the crust into the edges of the pie dish, all the way around.
Now, for the fun part! Cinnamon and sugar! My two favorite spices in the whole world.
Generously pour some cinnamon and sugar onto your rolling surface (this replaces the flour step above)...
Grab your second crust and roll in out onto the cinnamon/sugar mixture, flip it, and roll some more so that both sides are coated nicely.
This is going to be our lattice.
Find/determine/estimate/guess where the center of your crust is and make a cut, top to bottom.
From there, you will make five "pieces" to the right and "five pieces" to the left of that cut.
Back to the crust in the dish, fold the excess crust over and pinch to seal...
Now, take those peaches that have been sitting on the counter, being ingnored but creating sweet magic while they were ostracized to the corner because the crust was getting all the attention, poor peaches...oh, anyway, pour them into the crust.
Now, dot the top with butter. 'Cuz butter makes everything better.
And now for the lattice. Here's how Gram does her's. Find the handles on your pie dish, and lay one strip from handle to handle to mark "center" on your pie.
Then lay one strip on each side until you've placed five strips on the pie.
Turn up the two strips to the right and left of the center strip and lay a strip perpendicular across the remaining 3 strips.
Now, (I know, I know, this photo is showing you half a pie already "latticed"...just bear with me) lay those two pieces down, on top of the perpendicular piece you just laid, then lift up the middle and two outside strips, lay a piece perpendicular again, and repeat with the "two" pieces in the first step to lay the last strip of half of your lattice, then repeat on the other side.
And, if you aren't totally confused by now, I give you credit. Because I watched it happen right in front of me, and now I totally confused myself with the above explanation. Gah. Should've done a little video.
Finished:
Now, with those cinnamony-sugary strips hangin' over the edge...pinch 'em tight...
Then cut of the itty bitty extra parts.
Do what you wish with those. We've discovered that the garbage really likes them.
Now, if you have one of these Pampered Chef bad boys (or similar...we just tend to be partial to PC!) place it around the pie, to protect those delicate edges.
After approximately 45-50 minutes, behold your masterpiece!
If you have a fancy cutter, now's the time to use it. Or, just a knife. You know, whatever.
Just make sure to cut all the way through to the edges of the crust...so that you get the whole dang piece and don't leave any behind.
That would be tragic.
Yum.
Gram's Peach Pie
6-8 ripe peaches (or about 4 cups), peeled and large diced
1 +/- cup (more for not so sweet peaches, less for really sweet peaches) sugar
2 T tapioca (err on the side of "more" for a thicker pie filling)
dash of salt
2 Tbs fresh lemon juice
2 pie crusts
Flour to dust rolling surface
Cinnamon and sugar to dust rolling surface for lattice
Preheat oven to 350*, combine first five ingredients, mix gently and set aside while you prepare crusts. Roll out crust to fit pie dish, using knuckles, press crust into corners of pie dish then fold and seal edges of bottom crust over. Roll crust for lattice out onto cinnamon/sugar mixture, then cut 10 equal strips for lattice. Pour peaches into bottom crust and place lattice on top. Cover with "crust protector tin thingamajig" and bake for 45 minutes or until crust is golden brown.
Serve with ice cream or whipped cream and ENJOY!


Hey, thanks! That whole idea of lattice always looked too complicated but your Grandma's way made perfect sense to me. I can't wait to try it!
ReplyDeletewow..that looks and sound fabulous!! your step by step instructions are fabulous too.
ReplyDeleteLOVE LOVE LOVE all of the detailed pictures along with the instructions. Let me know when you write a cook book, because I'm a fan!
ReplyDelete