Oh, my dear sweet friends...is there anything better than chili cheese fries? Just as I finished typing that, I was reminded of what set off last summer's self diagnosed gall bladder attack...chili cheese fries.
SOOOOOO glad that didn't happen this time!
Gram and Gramp love to find some good chili cheese fries...but lemme tell ya somethin' (if you're trying to become fluent in MinneSOOOOtan, that means "listen up"), what Gram and I cooked up? It was nothing short of miraculous.
You can use your favorite chili recipe, or Gram's. I think it's kind of funny...seems like everyone has their own way of making chili. Mine differs slightly from Gram's whose differs slightly from my mom's whose differs quite a bit from my mother-in-laws. Little tweaks that make it "your own", you know?
Anyway, so stinking delicious. Let me show you.
Brown your hamburger...please take note of extra butter in Gram's beautiful, brand new Le Creuset.
And remember...SEASON your meat when it's raw! Smoosh it up and season it well with salt and pepper.
Now, process some onion into a fine dice and add it to the beef to cook, along with some minced garlic.
When the onions have started to soften, add in tomato paste...Gram actually suggests using the canned stuff for this, but she didn't have any. Improvisation at it's finest, folks! :)
Next up, add your beans and sauce. I learned something yesterday...don't drain your beans. I always drained my beans and added water, when I saw Gram didn't drain her beans I was all, "EUREKA!!!", why add water when you can add the bean water that has flavor?!
See? Gram is brilliant. (For the record, we added this large can as well as two smaller cans of beans.)
Now, the chili powder...three "Gram handfuls" of it!
And Gram says, "whenever you add anything with tomatoes, add sugar", so toss it in, baby!
Now, you stir and simmer and taste, adjusting as necessary. Let it simmer on the stovetop until it's nice and thick and the flavors have melded into chili deliciousness. I'd say that takes approximately 1 hour.
And now for the spuds. Just for fun, I had to show you this:
That would be my great-great grandma's scrubber, straight from Sweden. I love that my grandma still has these things around.
Anyway, grab your potatoes and scrub the heck out of 'em...but don't take off their skins. Just get 'em good and clean.
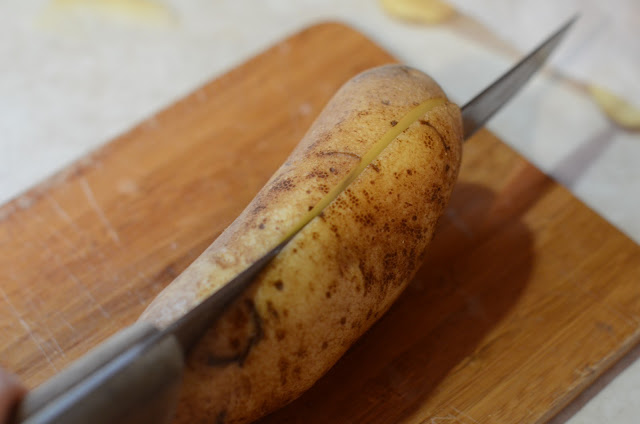
Then in half again:
Then in wedges of 4:
It's hard to see, but that there aluminum foil is SLATHERED with butter. We're making these along of the lines of Half-Baked Potatoes.
Then, melt some butter and brush it on all of the wedges...because if some butter is better, then more butter is even better-er?!
Now, season...potatoes take a lot of seasoning. Gram likes to use this "Mixed-Up Salt" blend, but season salt would be just fine too!
Sprinkle them generously.
And bake them first for about 20 min, then flip to one side:
Until turning golden brown (10-15 minutes) then flip to the opposite side:
Until nice and done!
Then serve 'em up and talk about how wonderful Mama and Gram are for showing you how to make such a sinfully delicious, easy meal! You're welcome. ;)
Here's how we'll do this, I'm going to post a link to "Gram's Chili Cheese Fries" with these recipes on it, but I'm also going to post the Chili Recipe and the Fry recipe separate, in the event that you'd just like one or the other to have! 'Cuz I'm so nice like that.
Gram's Chili Cheese Fries
Printable Recipe

Gram's Chili
Printable Recipe
2 pounds ground beef
1 small onion
1-2 cloves garlic, minced fine
salt and pepper
1 small can tomato paste
1 (15 oz) can tomato sauce
3 (15 oz) cans beans (chili, kidney, black...whatever floats your boat), undrained
3 "Gram handfuls" chili powder (approximately 1 generous tablespoon per handful)
1 "Gram handful" sugar
Season hamburger with salt and pepper and brown, adding extra butter if you see fit. :) Add onions and garlic. When onions begin to soften, add tomato paste, combine. Add remaining ingredients and simmer for about 1 hour, tasting every 15 minutes or so and adding more seasoning as needed. Serve when perfect and enjoy!
Gram's Homestyle Fries
Printable Recipe
6-8 large russet potatoes, scrubbed clean and sliced into hearty and delicious wedges
Softened butter to generously butter pan
Melted butter (1/2 stick) to butter wedges
Season salt, don't measure, just shake until all potatoes are seasoned
Preheat oven to 450*F. Arrange wedges on foil lined baking sheet (with sides) in single row, brush melted butter over wedges and season generously with salt. Place in preheated oven for 20 minutes, flip to one side and bake another 10-15 minutes or until wedges are browning, bake another 10-15 minutes to finish.
Eat as is or top wiuse for Chili Cheese Fries! Yum.


What cheese did you use?
ReplyDeleteoh my goodness....that looks delicious! I haven't had chili in some time. My mom used to make chili every winter with homemade corn bread, but since she past last year I won't be having any. Maybe it's time I try my hand at it!! Thank you so much for sharing! It looks so, so good!!
ReplyDelete-april